
It is possible to create 3D prints with multiple colors. This is done by swapping out filaments at different points in the prints. You can use something like the Prusa MMU to create prints with multiple colors on a single layer, but this requires more hardware and it’s pretty time intensive, buggy, and wasteful.
It is also possible to create multicolor prints by swapping the filament in between layers, so you could have a background that is one color and an image sitting on top of it that is a different color. This is possible with a feature in the stock Prusa Slicer, which I will document here, using this as an example:

Step 1: Create STL
Find and import SVG into Fusion360 and extruding the parts you want to be different colors to different heights. (Wikipedia seems to be a pretty good source for this.) For example:
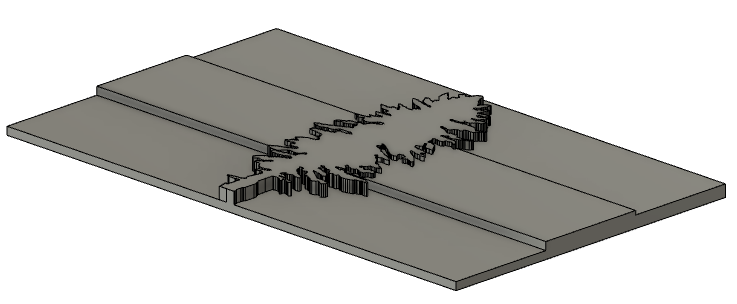
Extrusion Heights:
You’ll want to do it in multiples (increments?) of your layer height. So don’t do 1.5mm with a 0.2mm layer height, for example.
- Bottom Section (Green): 2mm
- Top Section (Blue): 3mm
- Middle Section (White): 4mm
- Tree (Black): 5mm
Import STL in Prusa Slicer. I used these settings:
- 0.2mm Layer Height
- 25% Infill
- Brim
- Everything else was default, include top/bottom horizontal layers
- 70°C for bed because I am printing in cold conditions and I was having problems with adhesion.
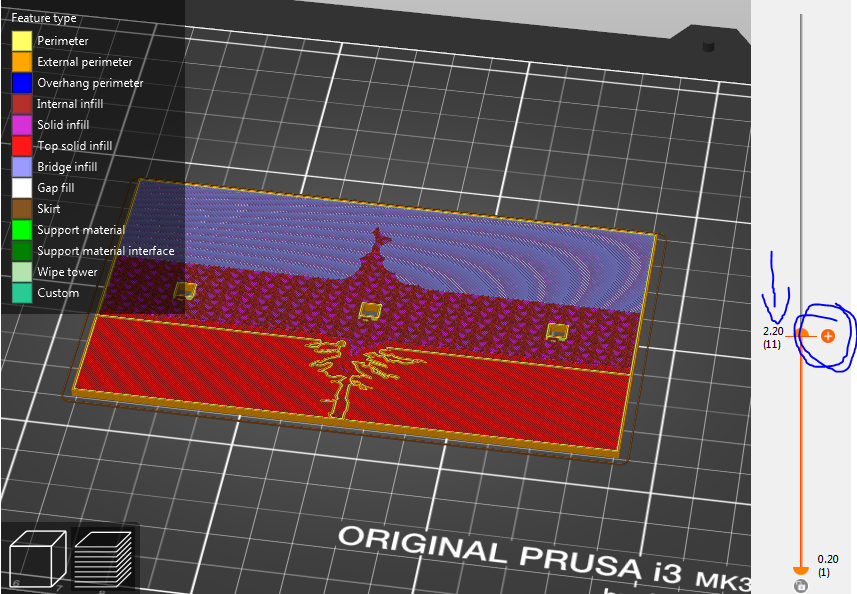
Click over to the “Preview” pane. Move the slider on the right so where you want to the layer change to occur. The number on the left is the height in millimeters at that time, and the number under that is the layer number. Click the “+” on the right to add a color change.
By adding color changes to a print, PrusaSlicer is adding an “M600” instruction to the GCODE at the specificed layer. When a Prusa printer hits the M600, it will move the print head out of the way and eject the filament, then prompt you to manually swap the filament. (It will also start beeping, so probably don’t want to let it wait while you are at work.)
At this point you will pull out the old filament, and push the new filament ALL THE WAY TO THE EXTRUDER. If you have an MMU, this command will not interact with the MMU at all. You will have to push the new filament all the way through the MMU body to the extruder. Once it’s in there, press the button and and it will have you confirm it’s extruding, then resume printing.
The following point is the whole reason I am writing this:
THIS PAUSE-AND-SWAP OCCURS BEFORE THE SELECTED LAYER BEGINS.
So if you want the layer at 2mm to be white, and everything above 2mm to be black, put at color change AT THE NEXT LAYER ABOVE 2MM.
So in my example, this is what it looked like in Prusa Slicer:
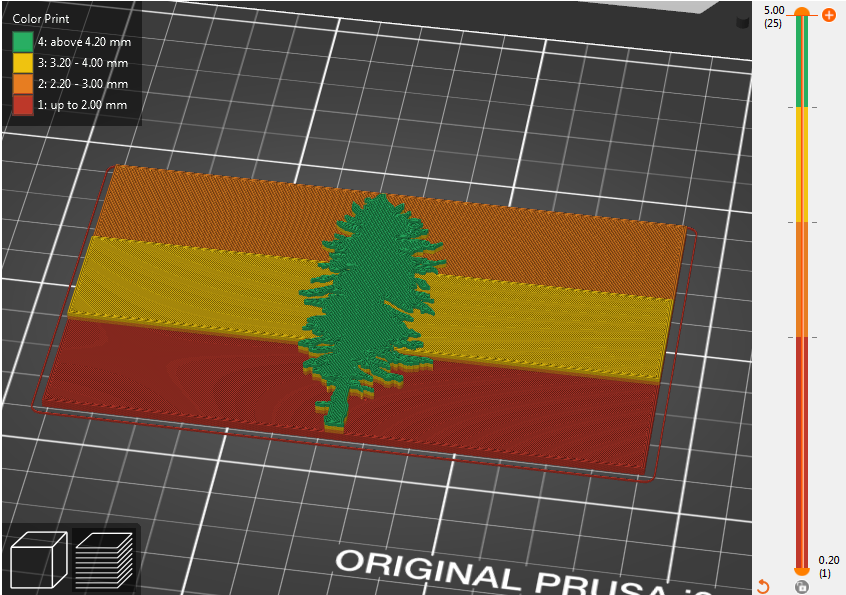
With Color Changes at:
- 2.2mm (Remove Green, Insert Blue)
- 3.2mm (Remove Blue, Insert White)
- 4.2mm (Remove White, Insert Black)
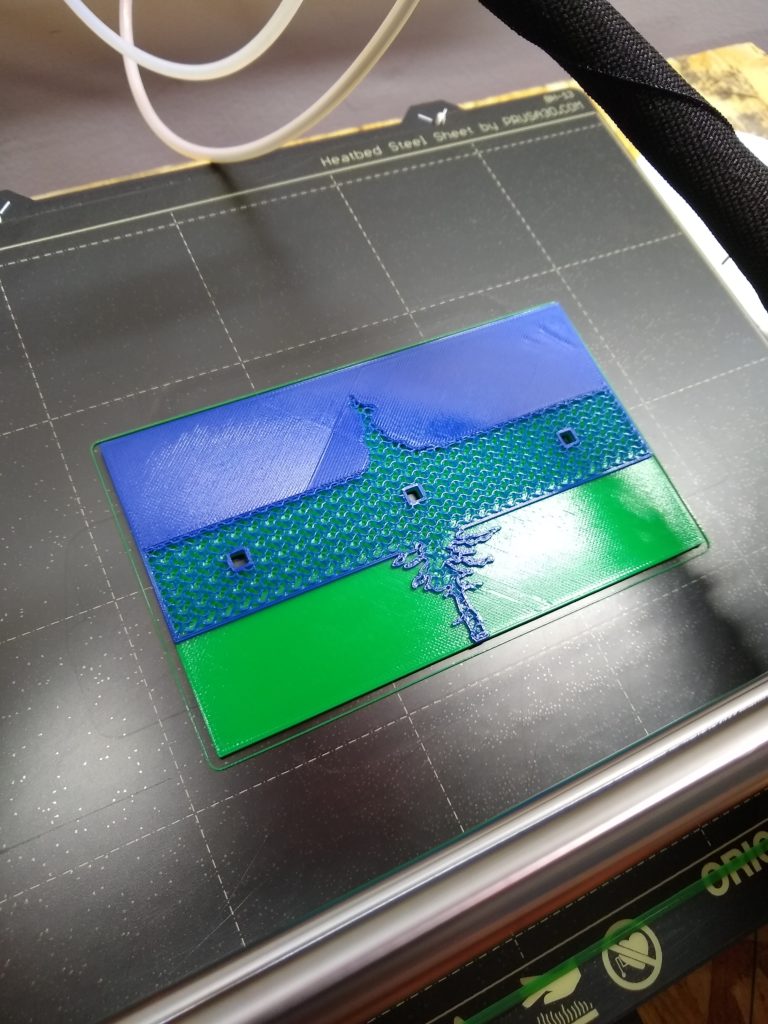
Mid-Print:
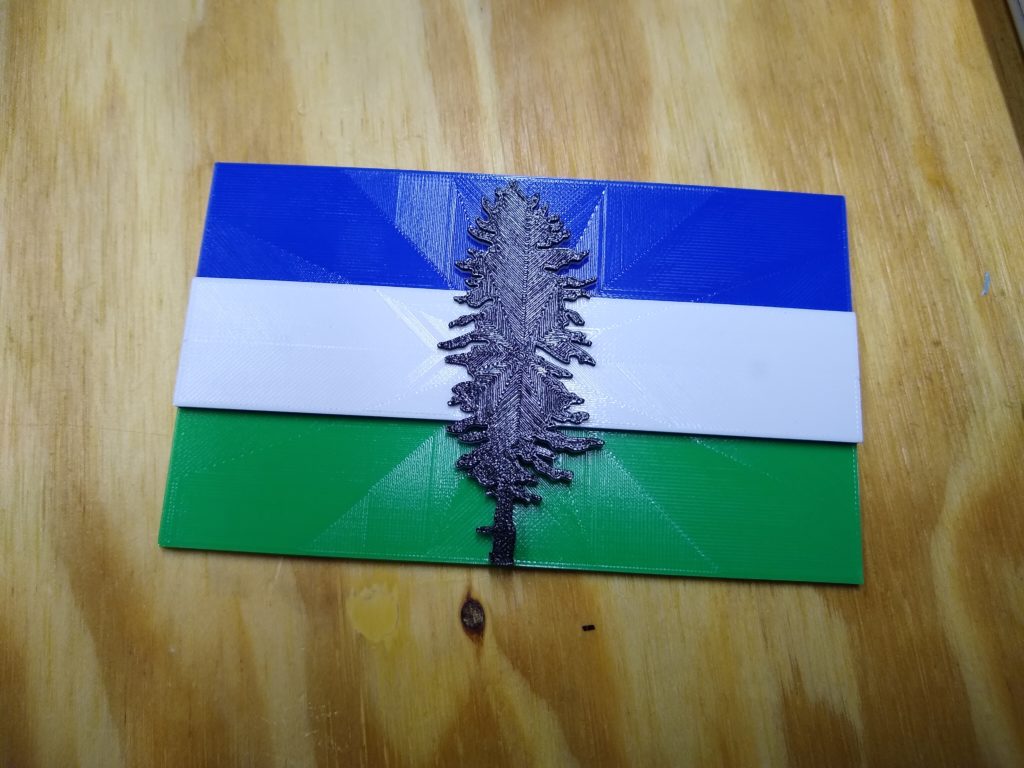
Final Product:
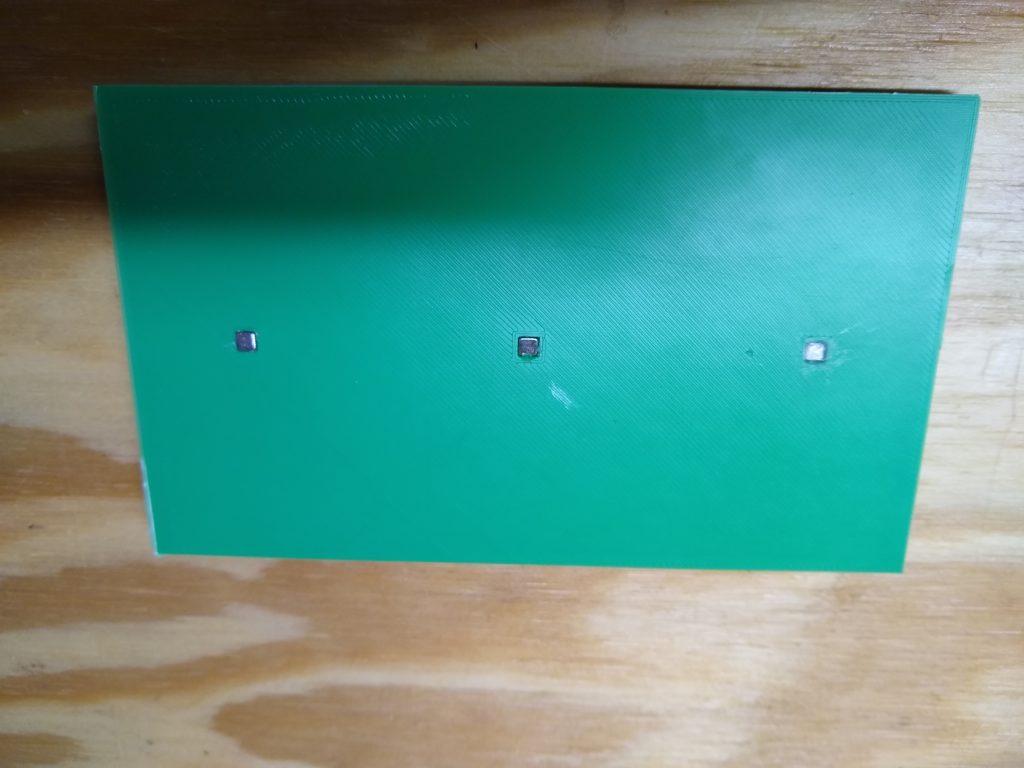
Reverse with embedded magnets:
Final Thoughts:
This ended up coming out pretty well. Prusa is adding in the ability to swap filaments at the layer change in the next release of Prusa Slicer, so that will make it easier.