3D printing magnets has been one of my favorite projects. Not the actual magnetized metal, but tacky placards to hang on your fridge or cubicle.
For Christmas many years ago someone gave me a bunch of small magnets (these happen to be 3.2mm cubed). So far in my magnets I have been leaving holes in the bottom and hot gluing them in. But this is messy and the magnets tend to be left behind after a while. I wanted to try embedding them inside the print itself, which would be pausing the print at a specific height, dropping the magnets in, and restarting the print.
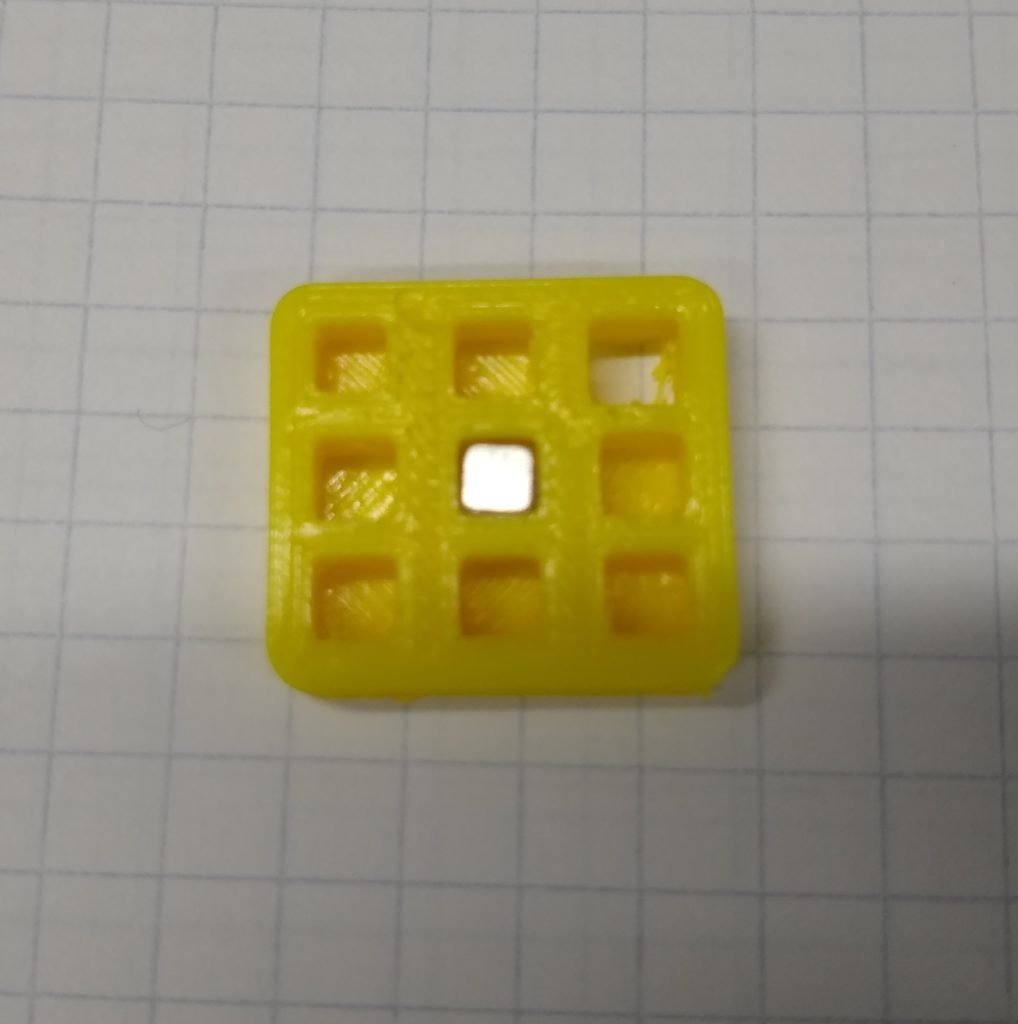
I wasn’t sure how much material to leave between the magnet and underside of the printed object, so I designed a test object:

The top row was for testing dimensions of the cavity to leave for the magnet. The bottom two rows tested how much materials to leave between the bottom of the magnet and the underside of the print:
| 3.2mm x 3.2mm | 3.6mm x 3.6mm | 4mm x 4mm |
| 0.2mm Floor | 0.4mm Floor | 0.6mm Floor |
| 0.8mm Floor | 1.0mm Floor | 1.2mm Floor |
These measurements were chosen because I am normally using a 0.4mm nozzle, laying down 0.2mm layers.
The 3.6mm….void…. was the best fitting, but a little loose. 3.4mm might be better but I am not sure how that would work based on the nozzle size. After printing one in 3.6mm I might go down as you could hear the magnets rattle when object was shaken shook done shook.
The magnet was able to hold up the test piece on all six options, but as expected, the strength of the hold weakened as more material/distance was added. I think the 0.4mm floor was the best compromise between strength of the hold and strength of the print.
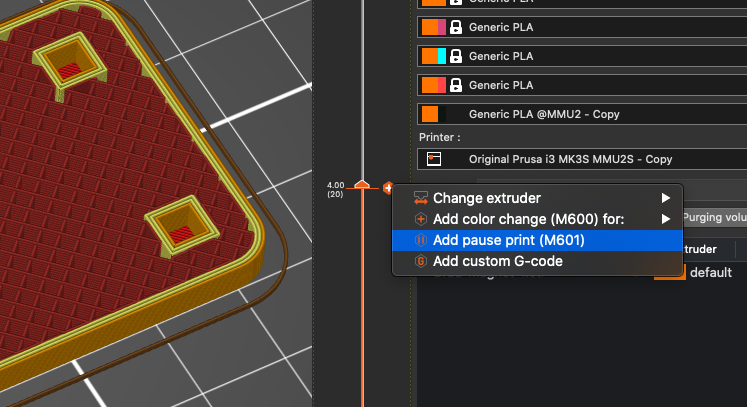
Turns out this is super easy to do in PrusaSlicer. Just move to the appropriate layer (the one right before the magnet voids are covered up), right-click on the “+” sign and “add pause print (M601)”. This will pause the print when it gets to that layer height so you can add your magnets (make sure the polarity is correct!). Once you are done, unpause the print from the printer.

